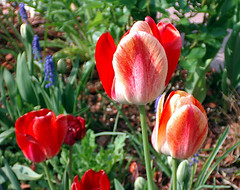
Have you planted your Spring Bulbs Yet?
 Bulbs are easy to grow and are a wonderful choice for the garden. They take up little space and provide a burst of color at a time when your border, or garden, can be flagging.
Firstly ensure that the bulbs that you purchase are healthy and free of disease. Avoid misshapen bulbs, any that look dry and withered or with areas of mold showing. These will not grow, but, worse, they also have the potential to spread disease to your existing bulbs.
If you are buying for container planting, large bulbs will produce more flowers. Smaller bulbs are perfectly fine for mass planting in the border.
Many smaller bulbs such as fritillaria are also more successful when bought in containers- always check that these moisture loving and other woodland bulbs have not dried out when buying.
Most bulbs come from the Mediterranean regions and enjoy free-draining, sunny positions. Some woodland bulbs do not. Erythronium (Dog’s Tooth Violets), Trilliums, Anemone nemerosa, Galanthus (Swnodrops) and the popular Arisaemas all need humus rich soil and cooler, shadier conditions.
Spring flowering bulbs are planted in autumn, autumn flowering bulbs are planted in spring. The planting technique is similar.
Narcissi should be planted by the end of March. You can plant later but the flowers will not be as prolific as the bulbs will have started into premature growth. Tulips can be planted a month later. Containers of bulbs can be planted later than bulbs in the ground as containers tend to warm earlier and the bulbs come into flower before those in the ground.
Plant mail-order bulbs of pot them straight away. Don’t try to keep them dry for long periods.
Preparing to Plant
Prepare the border by digging in some well-rotted compost or adding a fertilizer such as blood and bone. Do not plant bulbs directly on top of fresh manures or partially rotted compost- the decomposition of these materials may well affect and infect your bulbs.
Make the planting hole about twice the depth of the recommended planting depth, then fill to the required level. This gives a good, fertile and friable soil for the bulb roots to grow into and you will see a measurable difference in the flowers.
Sand or grit at the base of the planting hole improves drainage, especially on heavy, clay soils, and can deter some bulb-feeding pests.
Clumps of bulbs, planted three, five or seven to a generous planting hole (don’t crowd them) look more natural than serried rows. It all depends on the look that you want.
Formal planting needs to be carefully done, using a line or wooden marker to keep lines straight. Organize you bulbs so that you don’t muddle them – a bright yellow tulip in the midst of a pink scheme screams mistake.
Mulching bulbs helps stop soil temperature fluctuations and unseasonable bursts of growth.
Planting Depths
Planting at the right depth provides the right conditions for your bulbs- too shallow and they may suffer from summer height or winter frosts.
As a rough rule of thumb bulbs should be planted at a depth equivalent to three to four times the height of the bulb. On lighter, sandy soils, go even deeper.


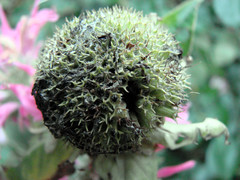
 I don’t have a good picture of my own Bee Balm seeds, although I do have a photo of a bee balm seed head.