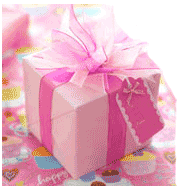
Have you finished wrapping all of the gifts that you are giving out this year? Or have you saved them all up and plan to sit down and wrap them all at the same time in the next day or two?
 If you still have some presents left to wrap here are some great tips and ideas that will help make your lovely gift look spectacular.
The first and most important piece of advice that I can give you is to conceal the sticky tape. Your wrapped gift will look so much nicer when the tape is concealed.
One method that I’ve practiced for years is to roll the tape into a loop so that I’ll have a sticky tape surface all around – inside none sticky, outside sticky. Then I simply slip the tape under or between the paper and press firmly to be sure it sticks. No tape is visible with this method.
Have you ever received a gift that was wrapped so beautifully that you almost didn’t want to open it? You can make your gift just as stunning by using bright coloured paper – red, green and gold are popular colours for Christmas gifts. Begin with the right choice of paper. I enjoy using either a nice foil paper, or a heavier weight glossy paper. Thin gift wrapping paper just tears to easily when you’re pulling it tightly around the present. Those sharp box corners end up damaging the paper and the only way to fix it is to add more of that dreaded tape!
Small gifts can either be the easiest to wrap or the most difficult. One rule of thumb is to only use the amount of paper that you need. I’ll place an item on the paper and measure with my eye, or I’ll gently roll the gift in the paper to get a general idea of how much paper I’ll need – then I cut the proper amount. Don’t be afraid to cut off excess paper. If you leave too much paper and fold it to fit it will just look bulky and the package under the wrap will lose it’s shape.
When I wrap a regular shaped gift I fold the outer edges of the paper inward before I seal it to make a nice sharp crease. I do this because the edges of rolled paper often have burred edges or if it’s been cut previously for another present it might not have been cut evenly. The little fold evens out the edges.
Oddly shaped or unboxed items can be a little more difficult to wrap but you can be creative with your wrapping techniques. For objects such as a plate fold the paper toward the center for a pleated circular fan effect.
To make a rossette, take a 2.5 cm wide (1 inch) piece of ribbon from a spool. Spread your four long fingers wide, then wrap the ribbon eight to 10 times around the fingers, to determine the length to be cut off.
Take the ribbon off your fingers, still folded, then fold the length in half again and cut the corners at the folded or closed end, so that the end is pointed.
Thread a 1.5-centimetre (3/4 inch) ribbon through the middle and knot the smaller ribbon tightly. Open the larger ribbon up and pull each section back from the centre in a twist towards yourself. Novice rosette makers may require a few attempts.