As the Garden Grows

What's blooming today?

  • Home
  • Blog
  • Archives
  • Links
  • About
  • Join GTS Meme
  • Guest Blogger
  • Contact

You are here: Home / Archives for Organic

Organic gardening

by Tricia

Whether you are already an organic gardener or perhaps you are looking to get started I’m sure you’d find it helpful to find out what other organic gardeners are doing and perhaps incorporate some of their tips into your own gardening routine.

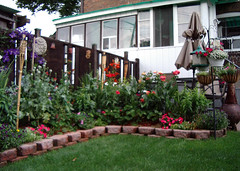
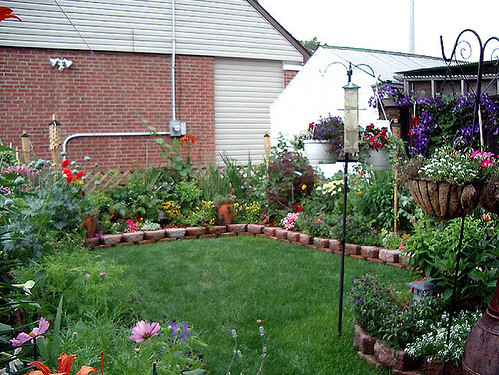
I practice organic gardening and my big secret is that I use Alfalfa tea (or compost tea) on all of my plants at least twice during the growing season. It’s like organic miracle grow. Honest. My roses absolutely love it and you guys have seen pictures of my plants, don’t they look happy?

Here’s what a few other Organic Gardeners are talking about this week:

Five Cheats For The Lazy Gardener: How To Hack A Garden

The crunch of carrots, snap of snow peas and ripe juicy tomatoes are all appetizing images. However, unlike many gardeners you may not have the time or energy to devote to growing. Don’t worry! If you have just one day to […]

Pests in Organic Gardening? No need to worry

If you’re into organic gardening, there are a number of things that you need to consider and one of them is a very interesting one: if you see a bug, it’s not the end of the world, or in this case your garden, as you know it. …

Partial Shade: Its Vital Role in Organic Vegetable Gardening

For gardeners, they know that shade plays an important role in what they are doing as much as the sun. This is especially true if one is into organic gardening of vegetables. The exposure to sun and its need to be in shade still depends …

The Truth About Organic Gardening

I just finished a great book about organic vs. conventional gardening. It is called “The Truth About Organic Gardening” by Jeff Gillman. Why did I like it? Well, for one it was an easy read. I’m a plant geek, not a bookworm. …

I hope that you get a chance to read one or all of these posts as there’s some good information there about organic gardening! Enjoy.


Filed Under: Garden Tips, Home and Lifestyle, Organic Tagged With: alfalfa, carrots, cheats, compost, compost tea, garden, juicy tomatoes, lazy gardener, Organic, organic gardener, organic gardeners, organic gardening, organic vegetable gardening, partial shade, pests, plant, plants, roses, season, snow peas, Vegetable, vegetables

Pet Alert – Cocoa bean mulch can be toxic to dogs

by Tricia

I use mulch in my garden beds, as I’m sure many of my fellow garden readers do as well.

I use shredded cedar and sometimes small cedar chips. It sure works well on the garden and looks nice too, but I suppose from a pet point of view that mulch isn’t the best bet. Plus the mulch I use is colored red and I have no idea if the dye is toxic or not, but I do know that coniferous woods like cedar are toxic to most animals.

My puppy is slowly learning to stay away from the garden, but when she was younger she was attracted to the cedar mulch and I found myself constantly pulling pieces of it out of her mouth (as soon as she grabbed it of course). She’s a Labrador Retriever – a breed that’s notorious for eating just about anything they can get in their mouth. They also have one of the highest rates of bowel obstructions (and surgeries due to said bowel obstructions) because of all the indigestible stuff they eat. That’s why I’ve been worried about my dog and my garden ever since I got her. Not to mention the toxic plants that I grow as well!

Cocoa bean mulch has become quite popular in recent years. It looks nice in garden beds, breaks down like other natural mulches and I believe it smells nice too.

If you happen to use Cocoa Bean Mulch in your garden and own a dog you might want to read the report that i just received in my ASPCA newsletter. Here’s an excerpt:

If your dog likes to spend his summer grazing in your garden, his treat-seeking nose may lead him to one danger in particular: the sweet-smelling, but potentially harmful cocoa bean mulch. Made of cocoa bean shells and considered desirable for its eventual degradation into organic fertilizer, this gardener’s choice can be toxic to canines if eaten in large quantities—and some dogs have been known to eat amazing amounts!

In 2007, the ASPCA Animal Poison Control Center (APCC) handled 26 cases of cocoa bean mulch ingestion—a third originating in California. “Dogs are attracted to the fertilizer’s sweet smell,” says Dr. Steven Hansen, ASPCA Veterinary Toxicologist and APCC Director, “but like chocolate, cocoa bean mulch can be too much for our canine companions.”

Ingestion of large amounts of cocoa bean mulch, which contains residual amounts of theobromine—a methylxanthine found in chocolate and known to be toxic to dogs—may cause a variety of clinical signs. These typically start with vomiting, diarrhea and elevated heart rate, and if large amounts are consumed, they may progress to hyperactivity, muscle tremors and possibly other more serious neurological signs.

Treatment includes administering medical-grade activated charcoal, bringing tremors under control, cardiac monitoring and preventing further exposure.

“One key point to remember is that some dogs, particularly those with indiscriminate eating habits, can be attracted to any organic matter,” says Dana Farbman, APCC Senior Manager, Professional Communications. “Therefore, if you have a dog with such eating habits, it’s important that you don’t leave him unsupervised or allow him into areas where such materials are being used.”

By now most of you have probably already added mulch to your garden, that is, if you regularly do add mulch. If you used cocoa bean mulch be sure to keep your dog away from your garden beds!

Filed Under: Garden Tips, Home and Lifestyle, In The Garden, Organic, Pets and Wildlife Tagged With: ASPCA, aspca animal poison control, bowel obstructions, canine, cedar, cedar chips, cedar mulch, chocolate, Cocoa, cocoa bean, cocoa bean mulch, cocoa mulch, coniferous woods, danger, degradation, diarrhea, dog, dogs, dye, eaten in large quantities, garden beds, gardener, grazing, harmful, ingestion, Labrador, labrador Retriever, methylxanthine, mouth, natural mulches, nose, Organic, organic mulch, pet, pets in garden, Poison, poison control center, puppy, summer, sweet smell, theobromine, toxic, toxic plants, Toxicologist, variety, vomiting

Making a Raised-Bed Garden

by Tricia

Back in 2002 when we landscaped our yard and started our garden we decided to create a raised bed garden.

We decided on raised bed gardening for a number of reason. The main reason being the soil in our yard seemed to be composed of mostly sand and clay. It was dry and difficult to dig deeper than 6 inches or so. amending the soil to a suitable consistency would have taken too long.

patio4 Raised garden beds are easy to build. They are also easy to plant new plants in, weed and maintain.

Other advantages of raised bed gardening that we considered before creating our garden were the fact that the soil would drain quickly in the spring when the snow melts, and the beds would warm up a little faster in the spring as well enabling us to either plant earlier in the season or giving the perennials and shrubs a head start.

So how can you make your own raised beds?

– We used easy wall garden stones (you can read the details of how we landscaped our garden here), but you can create your raised garden bed walls with:

– Concrete blocks, bricks, rocks, natural rot-resistant wood or wood that’s been treated with a safe preservative.

You might also need:

  • Sheet plastic and or a wood preservative if you create wood borders.
  • Measuring tape
  • Shovel
  • Spading fork
  • Rake
  • Hammer
  • Nails
  • Topsoil
  • Compost

Since our raised garden beds were meant to be permanent garden structures we also used gravel screening at the base of the easy wall stones to give the stones a good foundation and also to aid in drainage from the garden beds.

Temporary Raised Beds

If you’re still landscaping and trying to decide where you want to place your garden beds you might consider creating temporary raised garden beds. You can easily change your garden design each season using temporary raised garden beds.

All you really need to do to create a temporary raised bed is shovel garden soil into the area that you’ve planned for your raised bed. You might consider using Triple mix soil as it’s been blended with garden soil, topsoil and compost. Otherwise you can amend your garden spoil by adding top soil and compost to the mix yourself.

Permanent and temporary beds can be shaped in any way that you wish. You can create rectangular, curved, or even round beds.

The basics of building a raised garden bed is that it should be about 12 inches deep and usually no more than three to four feet wide.

Our beds are build around the edges of the garden so we only have access to each bed from one side, however you might think of making a round bed in the center of your lawn or placing two raised beds side by side with two to three feet of space between them for easy access. You’ll be able to access the garden beds from both sides so it will be even easier to care for than ours!

Be sure to remove any rocks, sticks or other debris from the garden bed as you create it. Rake the top of the bed smooth and flat when you are finished building up the soil.

Permanent raised garden beds:

When creating permanent raised garden beds you should use rot-resistant wood (cedar for example) or bricks, rocks, stones or cement blocks. As I said above your bed should be at least a foot deep and no more than three to four feet wide.

If you choose to use a rot resistant wood when creating your raised garden bed you might want to use an earth friendly preservative such as linseed oil or a borax based treatment to slow the rotting of the wood.

Raised beds can be build on the soil of your yard, but I’d recommend loosening the soil with a spading fork or shovel first.

Once you’ve completed building the walls of your raised beds fill with triple mix or top soil, garden soil and compost.

Planting Raised Beds

Now that you’ve created your raised beds you’ll be able to visualize how your garden will look when the beds are planted.

Depending upon what kind of garden you’ve planned you can plant vegetables, herbs or flowering plants in your raised beds.

As my regular readers know our raised beds have a mix of roses (over 60); shrubs – boxwood, Rose of Sharon, Rhododendron, and Azaleas; perennials – lavender, bee balm, saliva, Maltese cross, peonies and many more; and spring flowering plants and bulbs. We also grow tomatoes, carrots, peppers, herbs and leafy greens right in our raised beds along side the flowering plants. The mix of plants actually look quite nice together.

Most of your planting should be done during the spring and autumn months.

You might want to add some fertilizer to the soil around your new plants when you first plant them. We use natural fertilizers such as alfalfa pellets or brew some alfalfa tea or compost tea to use as fertilizer.

If you’ve built your raised garden beds along the perimeter of your yard or fence you’ll want to plant taller plants at the back of the raised beds and shorter plants near the front. If your raised bed is in the center of your yard you’ll likely want to plant the taller plants in the center/middle of the raised bed and surround them with shorter plants.

Just be sure not to compact the soil as you work in your raised beds planting your new plants.

Be sure to water your raised beds regularly. One of the cons of raised beds is that they dry out a little faster than other garden beds.

Every year, usually at the end of May or beginning of June we add some mulch to the garden beds.

We don’t do this earlier in the season as we like to turn the soil around the plants a little bit prior to adding mulch. turning the soil tends to keep slugs at bay. Perhaps their eggs die when exposed on top of the soil. Mulch too early and you might find your garden full of slugs.

Adding mulch to your garden beds adds organic material that will break down over time and help fertilize your soil. The seasonal benefit of mulching is of course that it helps conserve water by keeping the soil moist below the mulch and of course a layer of mulch two or three inches deep will keep weeds away too.

Use straw, shredded bark, shredded leaves or other materials for mulch.

Tips

As I said earlier we have a number of plants in our raised garden beds. I put some thought into what kind of plants I would grow so that I would pretty much have continuous blooms in my garden from late March to November and sometimes even early December.

A variety of bulbs and spring plants work well for early to late Spring. Choose some plants that bloom early and some that bloom later in the season.

Many of the spring blooming plants die down once the weather starts to warm up so they are planted near perennials and rose shrubs. So once they die down, the perennials appear or the roses begin to bloom and the space that the spring plants took in the garden is quickly filled by the growing perennials.

If you grow vegetables in the garden you can arrange to grow them in succession as well. Lettuce often does best in the spring or at least before the weather begins to get quite hot. Once your lettuce is done you might plant beans or another crop of vegetable that isn’t mature until late summer.

This is what our backyard looked like in July 2003 – just a little more than a year after we’d put in the raised garden beds –

wideview2

Believe it or not, the garden is even fuller now as the plants have reached maturity. It’s beautiful and even more amazing that we did it ourselves.

You can do – get inspired!

Filed Under: Garden Maintenance, Garden Tips, In The Garden, Landscaping Tagged With: Alfalfa tea, Azaleas, backyard, Beds, Bee Balm, bloom, blooming, blooms, boxwood, bricks, building, Bulbs, compost, conserve water, dig, easy wall, fertilizer, flower, garden, garden bed, garden beds, garden design, gardening, gravel, grow, grow vegetables, growing, landscape, Landscaping, maintain, Maltese cross, mulch, Organic, peonies, perennial, Perennials, permanent raised garden bed, plant, planted, planting, plants, raised beds, raised garden bed, raised garden beds, rake, rectangular, rose, Rose of Sharon, screening, shovel, shrub, slugs, snow, spring, spring flower, temporary raised garden beds, tips, tomato, Topsoil, warm, weed, weeds

  • « Previous Page
  • 1
  • 2
  • 3
  • 4
  • 5
  • 6
  • …
  • 8
  • Next Page »

Subscribe


Never miss a post
Subscribe to our RSS feed!
It's FREE! rss feed

Free Newsletter

As the Garden Grows
by Email - FREE!


Follow me on Twitter!

Suggested Sites

Eavestrough Cleaning Toronto

Categories

Recent Posts

  • Top Three Tips For Choosing The Right Patio Furniture For Your Home
  • The 4 Things To Know About Perennial Garden Design
  • Painful Plants: Five Houseplants That Can Cause Injury
  • An Outbreak Shouldn’t Mean A Break Out: 3 Insect Repellants Gentle Enough For Your Skin
  • 5 Ideas To Make Your Garden POP
  • 6 Simple Ways To Make Your Home Eco-Friendly
  • How To Redesign Your Garden To Make It Safe For Your Children
  • Starting A Career As A Professional Gardener
  • 6 Time Saving Tips For Gardening
  • Top Tips On Redesigning Your Garden For The Summer

What they’re Saying

  • Rodhe Stevens on Landscaping Tips On A Limited Budget
  • Edmund Wells on Benefits of using mulch on the garden
  • Surjith on An Outbreak Shouldn’t Mean A Break Out: 3 Insect Repellants Gentle Enough For Your Skin
  • Pamela on The 4 Things To Know About Perennial Garden Design
  • dog on The quality of your pet food is important

Pages

  • About
  • Archives
  • Become a Guest Blogger For As the Garden Grows
  • Blog
  • Categories
  • Contact
  • Disclosure
  • Do Follow Bloggers Blogroll
  • Green Thumb Sunday
  • I am Canadian Blogroll
  • Join GTS Meme
  • Links
  • Privacy Policy
  • Q & A
  • Toronto Bloggers Blogroll
  • What’s Growing

Search

My Garden

Member of
Garden Voices

Tags

backyard Beautiful bloom blooming blooms Bulbs cold Entertainment and Rec flower flowers garden garden bed garden beds gardener gardening green Green Thumb Green Thumb Sunday grow growing GTS home Home and Lifestyle House In The Garden leaves my garden photo photos plant plants purchase rain rose roses Shopping snow spring summer Toronto water weather winter Wordless Wednesday WW

Site Ratings


Visitors since 2006


Meta

  • Log in
  • Entries feed
  • Comments feed
  • WordPress.org

Connect with me

  • Facebook
  • Google Plus
  • Pintrest
  • Twitter
  • RSS

Copyright © 2026 · News Child Theme on Genesis Framework · WordPress · Log in