As the Garden Grows

What's blooming today?

  • Home
  • Blog
  • Archives
  • Links
  • About
  • Join GTS Meme
  • Guest Blogger
  • Contact

You are here: Home / Archives for sunlight

Time to enjoy Thanksgiving and Christmas Cactus’

by Tricia

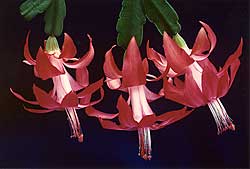
I have two cactus like plants. One is a Thanksgiving Cactus and the other is of the same species, Schlumbergera, and is known as a Christmas Cactus.

christmas cactus

General care for plants of the Schlumbergera species is to give them moderate to bright light in the Spring and Summer months. Lighting depends upon exactly which species you own.

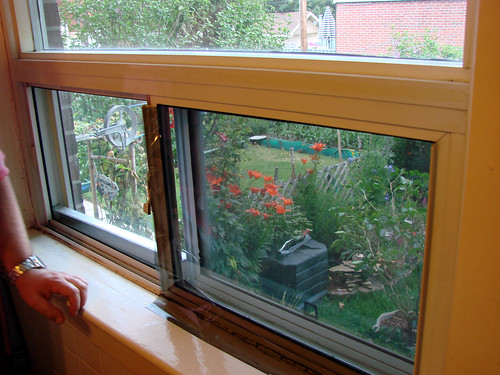
I’ve found that these cactus can burn in direct bright sunlight so I generally put mine outside in the summer time in an area where they only get bright direct sunlight for a couple of hours. The rest of the lighting they receive is usually fairly bright but not direct.

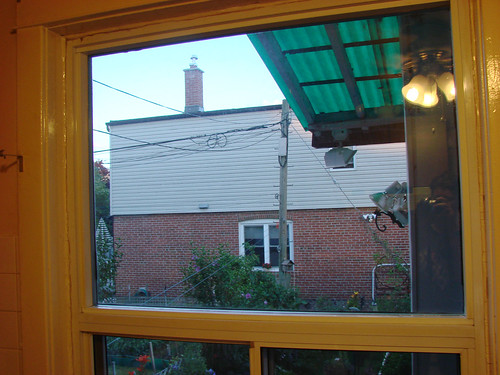
Come mid-September this year I moved my two cactus’ to my enclosed front porch. The porch faces north so the light levels are very low from September through to April or so.

Generally, to get these plants to flower when they are supposed to flower you should put them in a cool dark place from Mid September through October and barely water them if at all during that time. At the end of October you can bring them out of the darkness and place them in a fairly bright area of your home and water them as you normally would.

Occasionally fertilizing the plants through summer and a weak dose of fertilizer shortly after you bring them out of dormancy might help them to flower as well.

I experimented a bit this year.

You see, my Thanksgiving Cactus is about 6 years old and it’s always been a fairly good flower producer. My Christmas Cactus on the other hand, which is treated almost exactly the same as the Thanksgiving Cactus, is rather stingy when it comes to flowering.

When my mother died in 2004 my sister and I each took one of the 50+ year old Christmas Cactus. We knew one flowered better than the other. Guess which one my sister got? She just has to look at it and it flowers! I’m so jealous!

This year instead of bringing the cactus’ to the cool dark basement in Mid-September I put them in the enclosed front porch as I said early. Their lighting was diminished and they got the benefit of the cool late summer nights while on the porch.

It was only two weeks ago when outside night time temperatures were starting to come close to zero or lower that I brought them inside to the dark basement.

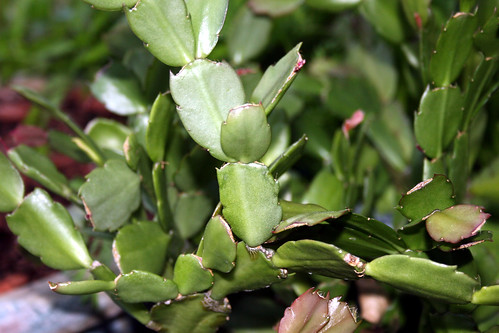
Checking on them today in the basement I noticed that both cactus have tiny flower buds on the tips of their thick succulent leaves. It looks like my experiment might have worked!

Now I do have to confess that I made a real rookie move that I should have known not to do.

The Christmas cactus is old and as a result it’s HUGE. Like 3+ feet in diameter. How can you bring that into the living room or kitchen and place it somewhere where it won’t be disturbed and where it will bloom prettily?

Christmas Cactus

I trimmed it! I really should have waited until the plant finished blooming before I trimmed off the newer growth. By trimming it before it flowered I might have destroyed it’s ability to bloom this year. Oh well … it’s not like I’m used to that Cactus blooming much anyway.

Of course I only trimmed a little bit off the edges. It’s still more than two feet in diameter. If you’d like to trim your Christmas or Thanksgiving cactus’ wait until they’ve finished blooming and then only trim a little bit of the soft newer green growth from the tips. Do not trim back to the older woody growth as that could damage the plant. Also, never trim too much off of any plant at one time as that could send it into shock.

I’ll let you know if the Christmas cactus blooms well, poorly or barely at all this year as a result of my experiment and my too early trimming!

I’ve brought both plants up and put them on tables or stands in my living room dining room and upon close inspections both have a fair number of buds. Perhaps the Christmas Cactus will bloom well, if early, this year?


Filed Under: House Plants, Perennials, Plant Profiles, Recreation Tagged With: basement, bloom, blooming, blooms, bright light, bud, buds, cactus, care, Christmas, Christmas Cactus, cool dark basement, cool down, dining room, dormancy, fertilize, fertilizer, flower, flowering, flowers, green, grow, growth, kitchen, leaf tips, leaves, light, lighting, living room, no water, october, period of darkness, photo, photos, plant, plants, Schlumbergera, September, spring, summer, sunlight, temperature, Thanksgiving, Thanksgiving cactus

It’s a hot one!

by Tricia

Oh my gosh. I’m just in from being in the garden for about an hour. I went outside to take some photos of flowers that have already been blooming for a week or two. You know how it is, if you don’t get the photos while they are blooming they’re gone! I already missed a few flowers that don’t re-bloom due to my lack of being in the garden much this year.

It is soooooooo hot outside! It’s apparently only 30 Celsius, but as always it’s pretty humid here and when you factor in the humidity it’s 39 c! That’s 102.2 F! I also happen to have a fever, as usual, so I’m sure my body wasn’t handling the heat and humidity as well as it should have.

When I came in I was literally soaked as if I’d been out there in the rain. Yuck. You can bet I hopped into the shower pretty quickly. I still feel overheated though.

I’m so thankful that we have air-conditioning. I know that I’ve said we have a fairly green lifestyle, but when it gets this hot here in the summer I don’t think I can easily give up my air conditioning. Hopefully all the rest of the stuff we do makes up for it.

Anyway, I just wanted to let you know that some more photos will be on their way shortly.

Hey let me ask you a question.

Do you like it when I post facts about the plants I photograph such as their hardiness, bloom times, whether they are drought tolerant and or like shade or sunlight?

I figure it helps those that are just getting started gardening. Plus if you haven’t tried growing a particular plant at least you’d know by reading the information that I post about each plant I photograph if it would do well in your area.

Filed Under: Garden Buzz, Garden Tips, Photography, Questions and Answers, Recreation, Summer in the Garden, Toronto, Weather related Tagged With: air conditioning, blooming, drought, drought tolerant, flower, flowers, garden, garden information, gardening, green, growing, hot, humid, humidity, information, photo, photograph, photos, plant, Plant Profiles, plants, rain, shade, shower, summer, sunlight

I Was Given Some Snap Tint Window Film to Try

by Tricia

snaptint-xcart-logo.gif

A few months ago I was contacted by a company called SnapTint. I believe that I’d done at least one write up for them in the past so I was familiar with the company and their home and car window tinting products.

The person who contacted me asked if they could send me one of their Do it yourself home window tinting kits. They wanted me to try their product on one of my windows and then if I wanted perhaps I could write about it to tell my readers of my experience.

I agreed to try their window film since my kitchen faces south and the sun coming in through the window in the morning is almost blinding! I figured a very light window tint couldn’t hurt and more than likely would reduce the glare and make the kitchen a much more pleasant place to spend time in on bright mornings.

DSC02291

A week to two weeks after I’d given the company the exact measurements of my window a long cardboard tube arrived. Actually we were out when it was delivered so one of our neighbors accepted it. The only problem was – they then went off on holidays forgetting to give us our package before they left! So my new window film has actually been here for about three weeks, but I only got it a week ago.

My husband and I decide to apply the window film to our kitchen windows on Sunday. We’d chosen one of the solar control film. There’s four types and the one that we were advised to use was the Suntek Symphony Neutral. We picked the lightest tint available which is the 50%.

I should mention here that along with the solar control films we could have picked one of their decorative or privacy films. I didn’t want that though as the kitchen window is how I view my garden while indoors. I suppose we could have also opted to take one of the car tint films but we didn’t really need that either since our car windows already have a built in tint.

I think putting the film on windows is best done by two people. I think it would be difficult if only one person were to attempt it. Not that it was hard – quite the opposite. Two people just made it that much easier.

We cleaned the windows well first.

Then, as directed we filled a spray bottle with a mixture of mild soap (baby shampoo, just a tad) and distilled water. We then liberally sprayed this mixture onto the first window pane that we’d decided to apply the film to. The slightly soapy mixture fixes the adhesive on the back of the window film and also makes it easier to move the window film around on the window as you put it in place.

We then peeled the backing off the first window film and applied it to the window. A quick spritz of the water mixture allowed us to use a squeegee on the window film to help push the air bubbles that were trapped under the film towards the window edges.

The window tint kit had come with some tools. I can’t remember what they are all called but the tools helped us smooth out the window film until it looked pretty much perfect on the window. We then used the box cutter that had come with the kit to trim the excess film from the window edges.

Here’s a photo of the first film after it had been applied, but before we trimmed it:

DSC02301

The film actually appeared to be quite a bit darker than I thought it would be.

You can see the difference between the window filmed pane and the untouched window panes in that photo. The directions said that the film would appear a little milky at first when applied but as it cured – it takes up to three weeks to cure – it would clear. I do think that now that the film has been on the windows for a few days that it has cleared a bit (it was never milky or opaque) and it looks great.

I should note here that the directions said that if any small air bubbles appeared, ones that were less than 1/8th of an inch that they would disappear as the film cured. I think we managed to get the majority of bubbles out, but there were a few. Now that the window is finished you cannot see any bubbles.

When we’d finished putting the window film on all three window panes I took this photo:

DSC02308

I believe it was about 6 pm at the time. It should have been much brighter out but the day was overcast so this photo doesn’t really show the window and it’s new tint in the best light. You can see that it is slightly tinted, but that we can still see outside quite well.

The curtains are back up and when you look at the window you’d never know we just put a film on it. i mean yes there’s a tint, but the film attached itself to the window so completely and my husband trimmed the excess film off so well you’d think the window came with the tint built in.

Some of the benefits that I’m looking forward to with our new window film is the fact that the film can reduce glare and heat by up to 93%. Our kitchen is on the south side of the house and is often the warmest room on the main floor in the summer. If it’s a few degrees cooler as a result of the window film I’ll be happy.

The solar film also blocks out up to 99% of harmful UV rays which means that any items, furnishings or even the curtains should be protected from the UV rays and as a result shouldn’t fade.

If you have a room that’s too bright or car windows that could use some tint to reduce glare visit SnapTint. My experience with their window film has been good so far. If I notice any changes in the film at any time – good or bad I’ll be sure to update this post.

At this point I’m happy to give SnapTint and it’s window films two thumbs up.

Filed Under: Decor, Great Sites, Home and Garden, Home and Lifestyle, Renovating and DIY, Shopping Tagged With: applying window tint, blocks UV rays, Car window tint, company, curtains, Decor, free sample, furnishings, glare, home, House, how to apply window tint, kitchen, photo, reduce glare, reduce heat, SnapTint, summer, sunlight, tinted window film, window, window film, window pane, window tint kits

  • « Previous Page
  • 1
  • 2
  • 3
  • Next Page »

Subscribe


Never miss a post
Subscribe to our RSS feed!
It's FREE! rss feed

Free Newsletter

As the Garden Grows
by Email - FREE!


Follow me on Twitter!

Suggested Sites

Eavestrough Cleaning Toronto

Categories

Recent Posts

  • Top Three Tips For Choosing The Right Patio Furniture For Your Home
  • The 4 Things To Know About Perennial Garden Design
  • Painful Plants: Five Houseplants That Can Cause Injury
  • An Outbreak Shouldn’t Mean A Break Out: 3 Insect Repellants Gentle Enough For Your Skin
  • 5 Ideas To Make Your Garden POP
  • 6 Simple Ways To Make Your Home Eco-Friendly
  • How To Redesign Your Garden To Make It Safe For Your Children
  • Starting A Career As A Professional Gardener
  • 6 Time Saving Tips For Gardening
  • Top Tips On Redesigning Your Garden For The Summer

What they’re Saying

  • Rodhe Stevens on Landscaping Tips On A Limited Budget
  • Edmund Wells on Benefits of using mulch on the garden
  • Surjith on An Outbreak Shouldn’t Mean A Break Out: 3 Insect Repellants Gentle Enough For Your Skin
  • Pamela on The 4 Things To Know About Perennial Garden Design
  • dog on The quality of your pet food is important

Pages

  • About
  • Archives
  • Become a Guest Blogger For As the Garden Grows
  • Blog
  • Categories
  • Contact
  • Disclosure
  • Do Follow Bloggers Blogroll
  • Green Thumb Sunday
  • I am Canadian Blogroll
  • Join GTS Meme
  • Links
  • Privacy Policy
  • Q & A
  • Toronto Bloggers Blogroll
  • What’s Growing

Search

My Garden

Member of
Garden Voices

Tags

backyard Beautiful bloom blooming blooms Bulbs cold Entertainment and Rec flower flowers garden garden bed garden beds gardener gardening green Green Thumb Green Thumb Sunday grow growing GTS home Home and Lifestyle House In The Garden leaves my garden photo photos plant plants purchase rain rose roses Shopping snow spring summer Toronto water weather winter Wordless Wednesday WW

Site Ratings


Visitors since 2006


Meta

  • Log in
  • Entries feed
  • Comments feed
  • WordPress.org

Connect with me

  • Facebook
  • Google Plus
  • Pintrest
  • Twitter
  • RSS

Copyright © 2026 · News Child Theme on Genesis Framework · WordPress · Log in