As the Garden Grows

What's blooming today?

  • Home
  • Blog
  • Archives
  • Links
  • About
  • Join GTS Meme
  • Guest Blogger
  • Contact

You are here: Home / Archives for weeds

We’ve been very busy in the garden the past two weeks

by Tricia

It feels like our garden is behind this year. It’s not because this year started out a lot rainier than most, no, it’s because our next door neighbors decided to replace their fence and thus the fence between our two properties had to be replaced, so we spent about two months waiting for it to be put in.

Our garden was on hold for a good part of that time. Oh I did regular garden maintenance on it, such as pruning the roses of dead branches after the long cold winter and making sure the garden beds weren’t full of weeds. However, I didn’t put in any new perennials or plant any annuals until after the fence went in. The shared fence didn’t start going in until the 6th of June so I’ve spent the last two weeks playing catch up with my garden … oh and giving the plants along the new fence tender loving care since new post holes and a big trench had to be dug which likely disturbed some of their roots.

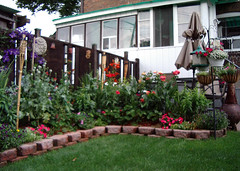
I’m exhausted … but I have to say, here on this first day of Summer, that my garden is starting to look the way I want it to. I must admit that a few weeks ago I was certain that my garden would pretty much be a write off this year. Oh and when the fence was going in I thought that my roses were going to be damaged. I have some very special roses along that fence line – Prince Napoleon, Sympathy and my gigantic William Baffin. I’d hate to lose any of them, but of the eight roses along that fence line Prince Napoleon and Sympathy would have been the worst ones to lose. As it was, we had to lean a few of the roses over while the fence work was being done and Prince Napoleon was leaning right over onto other roses and plants. I thought it was a goner for sure. As it is, it has a terrible case of Black Spot right now because of lack of air circulation due to basically lying on other plants for a week.

Since we’re in Garden and Yard sprucing up mode we sanded off the old paint on the doors of our storage areas under our enclosed back porch and I spent several hours yesterday repainting them. Wow .. everything looks so nice and new now.

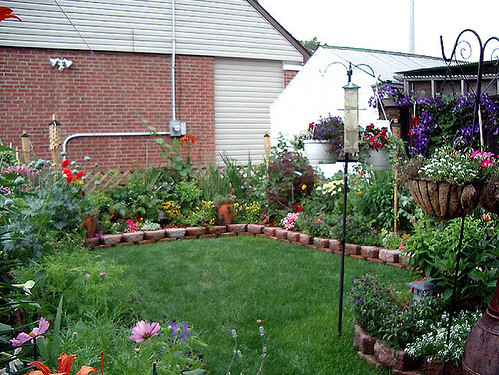
Perhaps by this weekend I’ll have slowed down from my outdoor activities and I’ll get around to moving some of my photos from my camera to my computer. If I do I’ll post some pictures of the new fence and how the garden looks now. It does look pretty good if I do say so myself.


Filed Under: Garden Buzz, Garden Maintenance, Home and Lifestyle, Spring Tasks, Summer in the Garden, The neighborhood, Toronto Tagged With: black spot, busy, care, damaged, exhausted, first day, garden, garden beds, neighbors, new fence, painting, photos, plants, Prince Napoleon, pruning, roots, rose, summer, sympathy, weeds

Lawn care tips from Spring through Autumn

by Tricia

Now that Autumn has arrived and the garden is winding down it might be time to think about the health of your lawn.

Here in Toronto there’s a ban on pesticide and insecticide use (not that I used them on my garden or lawn anyway as we are fully organic) so for some, it’s become harder to maintain the quality of their lawn.

The best defense against pests and weeds is a healthy turf, so I thought I’d post some lawn care tips that you can do now and in the spring to ensure that your lawn is healthy.

Autumn Lawn Care

Autumn is the best time to apply grass seed, repair damaged areas and thicken existing turf.

If you have weeds growing on your lawn take some time to carefully dig them out of the ground or if you are so inclined apply an appropriate weed killer to affected areas.

We usually aerate our lawn in the fall and late spring. Aeration will increase the amount of air, water and nutrients getting to the soil, which will strengthen grass roots and help create a healthier lawn. We use a simple two pronged tool that we can push into the earth with our foot, but I believe you can rent an aeration machine at your local hardware store.

A great time to fertilize and reseed the lawn is after aerating.

We also cut the grass at least once during this time of year (mower set to 2 – 3 inches) and give it a watering if it’s been dry.

Spring Lawn Care

If you live in a cool area that gets snow or a lot of moisture in the spring it’s best to stay off the lawn until the ground has dried and it’s firm to walk on.

Begin your spring lawn care by raking up dead grass, leaves and any other debris that might have accumulated throughout the winter season.

If your lawn is uneven or has “frost bumps” this is also a good time of year to roll out the bumps with a light roller.

Aerate the lawn – particularly in high traffic area and then apply a slow release lawn fertilizer. You might purchase a fertilizer with a crab grass preventer if that’s been a problem in previous years.

Spring through fall Mowing guidelines

As spring progresses you should apply grass seed either to the whole lawn or at least to thin areas. Remember a lawn with healthy thick turf will have fewer weeds.

Once the grass begins to grow and it’s time to mow it, remember to set your lawn mower to cut at a height of 2 to 3 inches and in the summer especially when it’s hot and dry outside raise the mower another 1/2 to raise drought resistance. Mowing short weakens the root system and gives weeds a chance to compete with the grass.

Mow in different directions and alter the pattern each time if you can. For example, go north-south, east-west, clockwise, counter-clockwise, diagonally, and so forth. This will cut more leaf surface on weeds that may tend to lean in the direction of mowing and may help the grass compete with them. It also reduces soil compaction and turf wear from the wheels.

Sharpen your mower blades at least once a year. Dull mower blades tear-off rather than cut grass blades. The torn leaves give the lawn a whitish caste and may leave it more vulnerable to disease problems.

It’s fine to leave the clippings on the lawn and if you have a mulching mower that will chop up the clippings further as it will speed up their decomposition. During the summer, clippings decompose and return nitrogen and other nutrients to your lawn. The decomposition is slower in cool weather.

Watering your Lawn

It’s best to water your lawn deeply, but infrequently rather than water regularly, but lightly – as infrequent and deep watering encourage deep roots.

Most lawns require approximately 1 inch of water per week. Use a rain gauge, coffee tin or aluminum pie plate to measure if the correct amount of water is being applied. High spots and south-facing slopes will need more water than other areas. Apply less water in shady areas that receive less than 4 hours of direct sunlight daily. Grass under large trees will need more water since the tree roots will consume water and the tree canopy may intercept rainfall.

Early morning watering is ideal as you’ll lose less water through evaporation. Watering in the evening or at night leaves the grass wetter long and can contribute to the development of diseases or fungus growth.

If you have a hot dry spell during the summer don’t be alarmed if your grass browns. It’s normal for it to go dormant during these kinds of conditions. It will come back nicely once the weather cools again.

Hopefully some of these tips will help you have a healthy lawn next year!

Filed Under: Autumn Tasks, Garden Tips, Home and Lifestyle, Lawn Care, Spring Tasks Tagged With: aerate, aeration, autumn lawn care, bumps, crab grass, damaged areas, fall lawn care, fertilize, fungus, grass, grass seed, healthy turf, Lawn Care, mow, mower, mowing, pull weeds, reseed, roller, sharpen blades, spring lawn care, thicken, watering, weeds

Making a Raised-Bed Garden

by Tricia

Back in 2002 when we landscaped our yard and started our garden we decided to create a raised bed garden.

We decided on raised bed gardening for a number of reason. The main reason being the soil in our yard seemed to be composed of mostly sand and clay. It was dry and difficult to dig deeper than 6 inches or so. amending the soil to a suitable consistency would have taken too long.

patio4 Raised garden beds are easy to build. They are also easy to plant new plants in, weed and maintain.

Other advantages of raised bed gardening that we considered before creating our garden were the fact that the soil would drain quickly in the spring when the snow melts, and the beds would warm up a little faster in the spring as well enabling us to either plant earlier in the season or giving the perennials and shrubs a head start.

So how can you make your own raised beds?

– We used easy wall garden stones (you can read the details of how we landscaped our garden here), but you can create your raised garden bed walls with:

– Concrete blocks, bricks, rocks, natural rot-resistant wood or wood that’s been treated with a safe preservative.

You might also need:

  • Sheet plastic and or a wood preservative if you create wood borders.
  • Measuring tape
  • Shovel
  • Spading fork
  • Rake
  • Hammer
  • Nails
  • Topsoil
  • Compost

Since our raised garden beds were meant to be permanent garden structures we also used gravel screening at the base of the easy wall stones to give the stones a good foundation and also to aid in drainage from the garden beds.

Temporary Raised Beds

If you’re still landscaping and trying to decide where you want to place your garden beds you might consider creating temporary raised garden beds. You can easily change your garden design each season using temporary raised garden beds.

All you really need to do to create a temporary raised bed is shovel garden soil into the area that you’ve planned for your raised bed. You might consider using Triple mix soil as it’s been blended with garden soil, topsoil and compost. Otherwise you can amend your garden spoil by adding top soil and compost to the mix yourself.

Permanent and temporary beds can be shaped in any way that you wish. You can create rectangular, curved, or even round beds.

The basics of building a raised garden bed is that it should be about 12 inches deep and usually no more than three to four feet wide.

Our beds are build around the edges of the garden so we only have access to each bed from one side, however you might think of making a round bed in the center of your lawn or placing two raised beds side by side with two to three feet of space between them for easy access. You’ll be able to access the garden beds from both sides so it will be even easier to care for than ours!

Be sure to remove any rocks, sticks or other debris from the garden bed as you create it. Rake the top of the bed smooth and flat when you are finished building up the soil.

Permanent raised garden beds:

When creating permanent raised garden beds you should use rot-resistant wood (cedar for example) or bricks, rocks, stones or cement blocks. As I said above your bed should be at least a foot deep and no more than three to four feet wide.

If you choose to use a rot resistant wood when creating your raised garden bed you might want to use an earth friendly preservative such as linseed oil or a borax based treatment to slow the rotting of the wood.

Raised beds can be build on the soil of your yard, but I’d recommend loosening the soil with a spading fork or shovel first.

Once you’ve completed building the walls of your raised beds fill with triple mix or top soil, garden soil and compost.

Planting Raised Beds

Now that you’ve created your raised beds you’ll be able to visualize how your garden will look when the beds are planted.

Depending upon what kind of garden you’ve planned you can plant vegetables, herbs or flowering plants in your raised beds.

As my regular readers know our raised beds have a mix of roses (over 60); shrubs – boxwood, Rose of Sharon, Rhododendron, and Azaleas; perennials – lavender, bee balm, saliva, Maltese cross, peonies and many more; and spring flowering plants and bulbs. We also grow tomatoes, carrots, peppers, herbs and leafy greens right in our raised beds along side the flowering plants. The mix of plants actually look quite nice together.

Most of your planting should be done during the spring and autumn months.

You might want to add some fertilizer to the soil around your new plants when you first plant them. We use natural fertilizers such as alfalfa pellets or brew some alfalfa tea or compost tea to use as fertilizer.

If you’ve built your raised garden beds along the perimeter of your yard or fence you’ll want to plant taller plants at the back of the raised beds and shorter plants near the front. If your raised bed is in the center of your yard you’ll likely want to plant the taller plants in the center/middle of the raised bed and surround them with shorter plants.

Just be sure not to compact the soil as you work in your raised beds planting your new plants.

Be sure to water your raised beds regularly. One of the cons of raised beds is that they dry out a little faster than other garden beds.

Every year, usually at the end of May or beginning of June we add some mulch to the garden beds.

We don’t do this earlier in the season as we like to turn the soil around the plants a little bit prior to adding mulch. turning the soil tends to keep slugs at bay. Perhaps their eggs die when exposed on top of the soil. Mulch too early and you might find your garden full of slugs.

Adding mulch to your garden beds adds organic material that will break down over time and help fertilize your soil. The seasonal benefit of mulching is of course that it helps conserve water by keeping the soil moist below the mulch and of course a layer of mulch two or three inches deep will keep weeds away too.

Use straw, shredded bark, shredded leaves or other materials for mulch.

Tips

As I said earlier we have a number of plants in our raised garden beds. I put some thought into what kind of plants I would grow so that I would pretty much have continuous blooms in my garden from late March to November and sometimes even early December.

A variety of bulbs and spring plants work well for early to late Spring. Choose some plants that bloom early and some that bloom later in the season.

Many of the spring blooming plants die down once the weather starts to warm up so they are planted near perennials and rose shrubs. So once they die down, the perennials appear or the roses begin to bloom and the space that the spring plants took in the garden is quickly filled by the growing perennials.

If you grow vegetables in the garden you can arrange to grow them in succession as well. Lettuce often does best in the spring or at least before the weather begins to get quite hot. Once your lettuce is done you might plant beans or another crop of vegetable that isn’t mature until late summer.

This is what our backyard looked like in July 2003 – just a little more than a year after we’d put in the raised garden beds –

wideview2

Believe it or not, the garden is even fuller now as the plants have reached maturity. It’s beautiful and even more amazing that we did it ourselves.

You can do – get inspired!

Filed Under: Garden Maintenance, Garden Tips, In The Garden, Landscaping Tagged With: Alfalfa tea, Azaleas, backyard, Beds, Bee Balm, bloom, blooming, blooms, boxwood, bricks, building, Bulbs, compost, conserve water, dig, easy wall, fertilizer, flower, garden, garden bed, garden beds, garden design, gardening, gravel, grow, grow vegetables, growing, landscape, Landscaping, maintain, Maltese cross, mulch, Organic, peonies, perennial, Perennials, permanent raised garden bed, plant, planted, planting, plants, raised beds, raised garden bed, raised garden beds, rake, rectangular, rose, Rose of Sharon, screening, shovel, shrub, slugs, snow, spring, spring flower, temporary raised garden beds, tips, tomato, Topsoil, warm, weed, weeds

  • « Previous Page
  • 1
  • 2
  • 3
  • 4
  • Next Page »

Subscribe


Never miss a post
Subscribe to our RSS feed!
It's FREE! rss feed

Free Newsletter

As the Garden Grows
by Email - FREE!


Follow me on Twitter!

Suggested Sites

Eavestrough Cleaning Toronto

Categories

Recent Posts

  • Top Three Tips For Choosing The Right Patio Furniture For Your Home
  • The 4 Things To Know About Perennial Garden Design
  • Painful Plants: Five Houseplants That Can Cause Injury
  • An Outbreak Shouldn’t Mean A Break Out: 3 Insect Repellants Gentle Enough For Your Skin
  • 5 Ideas To Make Your Garden POP
  • 6 Simple Ways To Make Your Home Eco-Friendly
  • How To Redesign Your Garden To Make It Safe For Your Children
  • Starting A Career As A Professional Gardener
  • 6 Time Saving Tips For Gardening
  • Top Tips On Redesigning Your Garden For The Summer

What they’re Saying

  • Rodhe Stevens on Landscaping Tips On A Limited Budget
  • Edmund Wells on Benefits of using mulch on the garden
  • Surjith on An Outbreak Shouldn’t Mean A Break Out: 3 Insect Repellants Gentle Enough For Your Skin
  • Pamela on The 4 Things To Know About Perennial Garden Design
  • dog on The quality of your pet food is important

Pages

  • About
  • Archives
  • Become a Guest Blogger For As the Garden Grows
  • Blog
  • Categories
  • Contact
  • Disclosure
  • Do Follow Bloggers Blogroll
  • Green Thumb Sunday
  • I am Canadian Blogroll
  • Join GTS Meme
  • Links
  • Privacy Policy
  • Q & A
  • Toronto Bloggers Blogroll
  • What’s Growing

Search

My Garden

Member of
Garden Voices

Tags

backyard Beautiful bloom blooming blooms Bulbs cold Entertainment and Rec flower flowers garden garden bed garden beds gardener gardening green Green Thumb Green Thumb Sunday grow growing GTS home Home and Lifestyle House In The Garden leaves my garden photo photos plant plants purchase rain rose roses Shopping snow spring summer Toronto water weather winter Wordless Wednesday WW

Site Ratings


Visitors since 2006


Meta

  • Log in
  • Entries feed
  • Comments feed
  • WordPress.org

Connect with me

  • Facebook
  • Google Plus
  • Pintrest
  • Twitter
  • RSS

Copyright © 2026 · News Child Theme on Genesis Framework · WordPress · Log in