• Entertainment
  • Musicians
  • Recreation
  • Guitars
  • Playing Styles

Guitar Licks

Guitars, tips and great music discussions

  • Home
  • Blog
  • Archives
  • Links
  • About
  • Guest Blogger
  • Contact


You are here: Home / Archives for Guitars / Guitar Equipment

The ultimate ROCKMAN by Tom Scholz

May 11, 2007 by Chris

The ROCKMAN by Tom Scholz is the result of the business venture that helped many budding rock stars obtain that BIG FAT Boston sound that everyone was after in the 1980’s.

Unfortunately or fortunately for myself during those years I did not get my hands on any of these ultimate tools of the trade. I was a young player who tried to create the sound that I wanted by going as direct as I could.

I know that is contrary to most of my posts but I wanted to, in the back of my mind, be as pure and honest with my sound as I could. I was trying to slay many dragons on many fields at once. My guitar mentor at the time, always was suspicious about all those tricks that some players used to fool the listeners. This was someone who I had trusted completely and I never thought twice about questioning his judgment. I hope to have him back in my guitar life if he will let me.

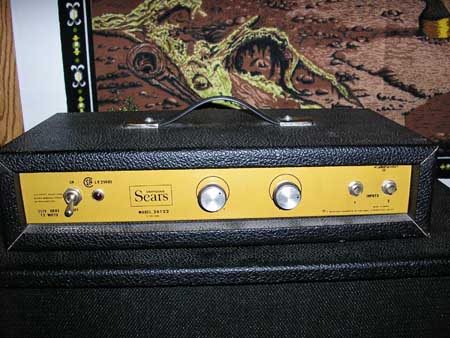
Here is an example of the power of the Rockman Sustainor. I’d love to have this one for sure, what do you think?

So, go through this site and tell me if you have had any dealings with any of these products. Please give us the pro’s and con’s of all aspects of them and don’t leave anything out, even if you think that they are self explanatory.

Keep on Jammin’


Filed Under: Guitar Equipment, Musicians, Shopping, Technology, Video Tagged With: amp, BIG FAT Boston sound, Boston, Getting that Boston sound, rock, rock star, Rockman Sustainor, the Rockman, Tom Scholz

I’m not violent but shouldn’t someone get these idiots

April 9, 2007 by Chris

I am forever asking certain guitar players “why don’t you wind up the excess string on the end of your guitar head? Someone is going to lose an eye!” This style of finishing is like a cowboy lasso. I always ask them if they have ever had the end of their string go into their finger or hand when restringing? Can you imagine what would happen if that nice little lasso thing ever untangled and hit someones eye? Well if that ever happened, you better get a lawyer, and fast!

When I was in high school, I had the honour of being in a band with the best theoretical guitar player/teacher I have ever known. These accomplished musicians, like most I played with in my early years, were much, much older then I was. We were in this band that played Beatles tunes and the like, only to make money and not a career of it. I was the only student that Chris P ever played in a band with to my knowledge. I recall with crystal clarity the day I learned this lesson about the excess string thing.

The bass player in the band was the best in our area. He was a big body builder as well. He was more like a fridge with legs, in all honestly. I was one of those idiots in my early years, who thought it was cool to have my strings tied up at the end of the guitar that looked like a lasso looking thing. The first practice we had, he stood up beside me and looked me in the eye, having to bend down really low to do so and said “I had a string like that almost pick my eye out by a guitar player once”. After having let the water that poured down my leg dry, I ran to find some pliers to cut off the excess. He was really a nice guy but …

Unless your perfect, and we all know someone like this, getting the end of a string in the finger is such a painful experience. I have had this experience a couple of times and believe me, you will pay much more attention when you restring your guitar in the future, if this ever happens to you. I actually nicked or pierced my finger while cleaning the head of my guitar once as well. There you go kids, cleaning is bad for your health, you heard it here first!

Always practice safe guitar maintenance.

Keep on Jammin’

Filed Under: Guitar Equipment, Guitar Maintenance Tagged With: guitar, Guitar Maintenance, guitar player, Guitar safety, Guitar upkeep, learn, musician, pain, restring your guitar, strings

How to restring your guitar

April 6, 2007 by Chris

NOTE: This is for beginners -as in people wanting to learn more about restringing techniques.

You know, this is my favorite but most dangerous part of guitar maintenance that I or you will ever do. Watch you fingers when working with the strings at the head of the the guitar. Look at some previous posts for medical advise.

(1) Take the strings out of the package. You either have strings that are colour coated, with a chart on the box or you can figure them out by looking closely at them. The thickest string is at the top and the thinest at the bottom.

(2) Put the string through the tail piece (on the body of the guitar).

(3) Place the body of the guitar on a table, with blanket on it so you don’t scratch the bottom of guitar. It also helps you move the guitar fast and smoothly when working. Make sure that you can have access to a chair so you can work at a good eye level to watch closely at what your doing.

Part (4) is background info that you need to understand before proceeding to part (5) & (6)

(4) Follow these visual steps. The last picture shows a little gap from where the bottom of the string is to the remaining part of the shaft of the tuning peg. I leave enough string or slack allows me to keep turning the tuning knob until the bottom of the string completely fills that space. I do not like to see any part of that shaft exposed. The more string that is attached means, a tighter wind and less room for the string to stretch. A change in the tension of the string = a change in tuning.

NOTE: This is the tricky part that you will have to determine by yourself because every guitar dimensions are different. After doing a couple of strings, you will get the hang of it. IF YOU DO THIS WRONG, YOUR GUITAR WILL NOT BLOW UP, ok? Just relax. Do not attempt while intoxicated.

(5) Move the guitar on the table so you can sit in a position that will allow you have the guitar head over and away from the table to let you start winding the strings.

(6) At this point we actually can start the winding process. Now with your right hand, grab the string that your working on by having fingers (index to pinkie), pulling up on the string while using your thumb pushing down on the string.

NOTE: Have your thumb push the string down on the fret board, right near the nut, where the string is suppose to be on the neck of the guitar. This will provide a small amount of the tension you will need to start winding the tuning peg.

(7) SLOWLY turn the tuning peg in the direction that you want. For guitars with 3 strings on each side of the head of the guitar, turn the head counter clock wise; for all others go clock wise. Pay close attention to the string that it follows going down the tuning head that will cover the gap that I talked about in part (4). The more you reach the bottom of this tuning peg, let the tension that you thumb is exerting on the string off little by little until you have covered that area of the shaft of the tuning peg.

(8) Place any finger you want to use (I use my index) directly on the nut (the white piece between the top of the neck and head of the guitar) of the guitar that corresponds to which string you are replacing. I want you to put pressure on that direct spot that holds your new string in place. This will stop the string from moving anywhere while you are doing the next part.

(9) With your right hand, grab the string that you are working on and pull the string in a upward and downward direction. Remember to keep your finger down tightly on the nut. What this is doing is, by pulling upwards and downwards on the strings, it tightens or pulls the strings coils on the tuning head closer thus making them less likely to move or slip.

Note: A change in tension = a change in the note or key of the string. When they slip or loosen up, the guitar string goes out of tune. The exact tension of the strings determines how they vibrate. The vibration is the note you want. Think about how a sign wave works, if your not sure or want to know more look up the details. Remember, knowledge is power.

Keep on Jammin’

Filed Under: Guitar Equipment, Guitar Maintenance Tagged With: acoustic guitar, electric guitar, guitar, Guitar Maintenance, how to, How to re string your guitar, restringing your guitar, string tension, tightening strings, vibration

Line 6 Floor POD

April 3, 2007 by Chris

Finally the pedal that I have been looking for is available in a real foot pedal! I was just surfing the Electric Guitar Review today and came across one of his posts about it. I have written here before about this Line 6 product that only came as a “plug in” for a mixing board. I was first exposed to this baby by my good friends at G-Force Media and now it is in a foot pedal version.

The Line 6 Floor POD is a very versatile piece of equipment that I would love to get my little hands on. The sound reproductions and clarity are out of this world. This little piece of heaven is compact enough to go anyway you want to. The above link takes you to the sounds that it can reproduce.

This one suits me just fine thank you. I would use this more for my acoustic guitar and at the drop of a hat, have my electric collection do likewise. The sample sounds, for this product, on their site is a good mirror of what I do anyway.

With the Floor POD, you can have 64 pre-set sounds that also allows you to create you own unique sound signature and then save it as a pre-set one. You can also use your existing pedal along with it if you wish. As well, you can plug it directly into a PA system and hook up a CD player if needed. Best of all you can plug in your head phones and just enjoy the raw power that this thing punches out without the wife or neighbours freaking out!

The only drawbacks are that you cannot use Gearbox software or Line 6 Edit. You also cannot back up your patches

I love the effects that come with this puppy. They are Insane Melodic, Big and Wide, Harmonic Chorus, Harmony & Rhythm, Clean Chorus, Steely Montgomery and Double D. Insane Melodic gets an honorable mention here as well folks.

So now I have to find out where I can take this pedal out for a spin here in Toronto. When I do, I’m sure your hear about it!

BTW, my wife just made $2500.00 US with one of her online companies so I could be “off to see the Pedal” (use the Wizard of OZ theme song here folks), before long, … maybe.

Keep on Jammin’

Filed Under: Guitar Equipment, Technology Tagged With: Acoustic, acoustic guitar, amp, electric guitar, jammin, Line 6 Floor POD, pedal, sound

Breaking in new guitar strings

April 3, 2007 by Chris

After putting new strings on your guitar, do you ever notice that they go out of tune easily for a while after? You’d think that after all of your careful preparation and time that you put into it, that you shouldn’t have to worry about tuning it for a long time to come? WRONG! You have to break them in.

What I do religiously after putting strings on is this.

(1) Put the guitar on your lap.

(2) Place any finger you want to use on your left hand, (I use my index) directly on the nut (the white piece between the top of the neck and head of the guitar) of the guitar that corresponds to which string you are replacing. I want you to put pressure on that direct spot. This will stop the string from moving anywhere while you are doing the next part.

(3) With your right hand, grab the string that you are working on and pull the string up and down. Remember to keep your finger down tightly on the nut. What this is doing is, by pulling upwards and downwards on the strings, it tightens or pulls the strings on the tuning head closer together thus making them less likely to move or slip in the future.

Note: When strings slip or loosen up the guitar goes out of tune. The exact tension of the strings determines how they vibrate and at what frequency. The vibration is the note you want. Think about how a sign way works, if your not sure or want to know more look up more details.

This is important when re-stringing while playing live because without doing this before you start playing again, the string will become more and more out of tune every time you hit or bend the string, thus making you sound like a fool. You don’t want that do you?

Keep on Jammin’

Filed Under: Guitar Equipment, Guitar Maintenance Tagged With: break in guitar string, Guitar Maintenance, guitar tuning, How to keep your guitar strings in tune, tighten guitar string, vibration

The Harp Guitar

March 31, 2007 by Chris

This instrument, the Harp Guitar, is the sweetest and most challenging one to perfect. Some of the great musicians to play this instrument have been Robbie Robertson, Steve Howe, Pat Metheny just to name a few.

The Harp Guitar is considered beautiful to the eyes and ears. Even Gibson was a Guitar Harp producer. We have a great Canadian woman who creates these missing links to the musical past and she is, Linda Manzer.

I have chosen Michael Hedges to illustrate this to you today. Unfortunately, like all the great ones, he is no longer with us. He was only 43 when he pasted away from a car crash.

The Guitar Harp has the appearance of a mythical instrument from the days of Robbin Hood, the Lutes of 1265 C.E. (C.E. = Common Era, used to be called A.D.) or the Baroque period. An ageless instrument at that!

I have never seen one up close but if I could be alone with one for a moment or so, I would try to decode this thing once and for all. I have tried my luck on a Lute and it was really fun to play. I love the sound and the action on the Lute. The neck is wide and the length is short, which makes it easier to play in my eyes. I suggest that if the opportunity presents itself, you should take full advantage of the moment to broaden your musical horizons.

Keep on Jammin’, (even Harp style)

Filed Under: Guitar Equipment, Music, Musicians, Songs to play, Video Tagged With: challenging, guitars, Harp guitar, instrument, Michael Hedges, Music, musician, Musicians, sound, Steve Howe, YES

How to figure out what strings you really need

March 29, 2007 by Chris

If you want your guitar to sound it’s best when you play it, you have to determine what type of strings you need to compliment your style of playing. Take your guitar in to have the intonation on your axe set by the best guitar technician possible in your area.

Intonation on a guitar is what we call the action on your guitar. This allows you to play/hit your strings effortlessly. Trust me, it’s worth the extra few bucks and time to get this done correctly. The better the intonation, the better the chance of your strings staying in tune longer. The less you have to bend the string, the less they lose their tension. That should speak volumes in itself.

I am forever fine tuning my guitars. People tell me that I make it look like an art form – or maybe they mean I’m being anal retentive!

When you go into a music store tell them what style of music you are playing, and how you want the guitar to react. I recommend kissing this person’s butt by going to see them on a Tuesday in the A.M. if possible.

Going there on weekends is like going to the lions den. There are always way too many kids and rookies in the store to drive them crazy. Monday is the day they try to remember what they were told to do and start off where they last ended. It can be the craziest part of their work week. Besides, who really does their best work on a Monday? Makes sense, huh?

Bringing a coffee can go a long way. Yes, I’m a kiss up artist too.

After you’re done kissing up, ask the techie what type of set-up they are putting on your guitar. This will help you in determining or narrowing down what type of string you should use. You can even ask him or her what type of strings they would recommend for your guitar and playing style.

Remember, a techie is the person who works on guitars. They are players themselves in their own right, but having said that, they also might not the ones to help make your final decision about your strings. NO disrespect intended to all you masters of guitar maintenance! The techie helping you might be biased towards certain types of equipment and or a certain type of sound. The more opinions the better, so ask around for further input. Remember, knowledge is power.

Keep on Jammin’

Filed Under: Guitar Equipment, Guitar Maintenance, Shopping, Technology Tagged With: acoustic guitar strings, electric guitar strings, guitar intonation, How to pick which guitar strings to use

Getting the RD Artist ready for battle

March 28, 2007 by Chris

The other day I had to do a few errands like pick up some grocery’s and earth worms for our turtles. Oh BTW, we use to have lots of reptiles like, Chinese Water Dragons, and a HUGE Iguana named Napoleon that we called our son who I miss every day, and some turtles.

Before starting off I decided to go to the 12th Fret to finally start paying more attention to my electric guitar ambitions. I haven’t restrung my RD in years. Whenever I broke a string, I just put another one on from the pack that I bought ages ago.

Yes, I really do feel bad about not paying proper homage to this beauty but, I did not have any use for it for a long time.

While visiting the store, I ran into my favorite guitar technician Tim. This guitar master is very knowledgeable in his field. He’s the type of guy you can sit down with and ask for honest opinions about what direction you should take in any situation. Tim has the uncanny personal trait of making you feel relaxed and at home. He has that trustful older brother demeanor. He is also the proud papa of a 16 day old boy, whom I’m sure is a guitar prodigy to be.

So I told him what I was looking for and he started to ask me about what setting/intonation I was using. I felt a bit like a rookie when I told him I had no idea. So as not to directly acknowledge my stupidity, he started explaining my options to me. Ahhhh, finally dodging a big bullet. I was saying to myself, “thanx for not dwelling on that too long Tim!”

He asked what type of feel the guitar strings had in regards to malleability or flexibility and he directed my attention to the D’Addario XL EXL110’s. These electric strings are nickel wound and have a regular light gauge to them.

How you restring your guitar is the most important thing that you will ever do to your axe.

You have to make sure that the way you wind them around the tuning pegs are perfect in every way.

How you thread the string through the eyelet – or the little whole on the tuning head- is very important. The length at which you start winding it, the tension that you have on it, using your other hand, and how close they are placed together on the shaft of the tuning peg is paramount.

Imagine when you are measuring an angle. If you start a little bit off, as little as one degree, it will only get worst at the end of your project. Does that make sense to you?

The strings are on, and the windings look good. Now it’s time to start working them in! For further results, tune in next week!

Keep on Jammin’

Filed Under: Guitar Equipment, Guitars, My Equipment Tagged With: 12th Fret, D Addario XL EXL110, electric guitar, flexibility, Guitar Equipment, guitar strings, guitars, light gauge, malleability, My Equipment, nickel wound, RD Artist, regular, restring your guitar, Tim, tuning pegs

My second amp – a Silvertone Sears modell 26122

March 19, 2007 by Chris

I can’t believe what you can find out there online.

I was writing a post today and as usual, drifted into la la land. Or should I say down memory lane.

I came across this guys site and he had the same amp that I had when I was in grade 7, I think. It was called a Sears-Simpson 12-watt head .

This amp was purely for looks. It had a huge cabinet that was very impressive to look at for the uninitiated guitar player wanna be. I do believe it only had a 12 inch speaker but the big black box made it look like many more were hiding in there.

sears-simpson26122.jpg

I just kept this thing around and used it to play through until I was given my HIWATT. After a while I had a great idea on what to do with this under utilized big black box. I just to put it underneath my HIWATT to make it look even bigger. Boy was I the cat’s meow back in the day.

The speaker box was very light but durable. I never tried to hook it to the HIWATT because I thought that the speaker cones (the little round things in the middle of speakers) would end up being shot out it to the other side of a room.

This is the amp that I had to use my BOSS Distortion DS-1 with because it had no distortion on it at all. Now I know why it didn’t, because it was a bass guitar amp! This was a true case of size over substance.

Keep on Jammin’

Filed Under: Guitar Equipment, My Equipment, Technology Tagged With: amp, amplifier, Guitar Equipment, Hiwatt, My Equipment, Sears amplifiers, Silvertone Sears model 26122, speakers, Technology

My Medal Pedal – Boss Distortion DS-1

March 16, 2007 by Chris

I honestly did not use this pedal much after obtaining my 50 watt, HIWATT 1/2 stack, but it was invaluable until I did. This was the first pedal that I got when I was like the kid that Jerry Doucette sang about in his greatest song ever, “Mamma let that boy, play some Rock & Roll”.

It was overpowering at first, for a young kid. That was in the pre-metal/experimental years.

Eventually I learned to tame it, or was it the other way around, interesting? I had dropped that thing so many times I can’t remember but as they say, “takes a beating”!

Some of my friends used the Over Drive pedal. I just thought that it was not what I wanted my music to sound like. It was too rough and not well defined, honest – that is what I said when I was a kid!

Which one do you like?

Keep on Jammin’

Filed Under: Guitar Equipment, My Equipment, Technology Tagged With: Guitar Equipment, My Equipment, Technology

  • « Previous Page
  • 1
  • 2
  • 3
  • 4
  • 5
  • 6
  • Next Page »

Connect with Us

  • RSS

Suggested Sites


Eavestrough Cleaning Toronto

Categories

Recent Posts

  • 5 Amazing Alternative Rock Albums Of The 90s
  • Want To Learn To Be A Musician?
  • How Can Ambitious Musicians Find Great Advice From Professionals?
  • Which Musical Instruments Are Hardest To Learn?
  • Things To Know When Beginning A Career In Music
  • Suicidal Tendencies Still Rocking After All These Years
  • Learning Guitar Basics Online

Recent Comments

  • Judy Green on The Old Gasworks was a Toronto institution for music lovers and bands
  • Frank Bolduc on The Old Gasworks was a Toronto institution for music lovers and bands
  • Tom Farr on 5 Amazing Alternative Rock Albums Of The 90s
  • DW on 5 Amazing Alternative Rock Albums Of The 90s
  • Nick Othen on 5 Famous People And Their Guitars

Subscribe

Never miss a post
FREE - Subscribe NOW!
Read our posts in your favorite RSS reader.
rss feed

OR

Subscribe to Guitar Licks by FREE Email Newsletter


Follow us on TWITTER!

Alltop, confirmation that I kick ass
Alltop Guitar news

Shopping

Gifts, Gadgets,
Books and More!

Site Ratings

Visitors


Meta

  • Log in
  • Entries feed
  • Comments feed
  • WordPress.org

Archives

Search

Pages

  • About
  • Archives
  • Become a Guest Blogger for Guest Licks
  • Blog
  • Canadian Bloggers
  • Contact
  • Disclosure
  • Do Follow Bloggers
  • Links
  • Privacy Policy
  • Toronto Bloggers

Blogroll

  • Guitar-Werks
  • Guitar Boomer
  • Eavestrough Cleaning Toronto

My Store

  • My Store

Other Sites

  • As the garden grows
  • Reptile Logic
  • You are in my world now
  • Guitar Licks and Tips
  • Truly Odd Planet

Tags

Acoustic amp band bands Brantford Bruce Cockburn Canada Canadian concert Entertainment fender funny General guitar Guitar Equipment guitarist guitar player guitars Home house Humor humour instrument jammin jazz John Mayer keyboard Live Music musician Musicians play playing Progressive Rock Pylis rock RUSH Songs to play sound strings Technology Toronto tour Video YES

Copyright © 2026 · News Pro Theme on Genesis Framework · WordPress · Log in