• Entertainment
  • Musicians
  • Recreation
  • Guitars
  • Playing Styles

Guitar Licks

Guitars, tips and great music discussions

  • Home
  • Blog
  • Archives
  • Links
  • About
  • Guest Blogger
  • Contact


You are here: Home / Archives for Guitars / Guitar Maintenance

Carpal Tunnel Syndrome exercises for guitarist

April 29, 2009 by Chris

This is a post for all you guitarists that may be affected by the painful disorder better known as Carpal Tunnel Syndrome (CTS). This can be the result of the compression of nerves in the wrist due to repetitive (motion). This can be the consequence of many daily tasks that one does over and over again (typists for example often suffer from CTS).

Symptoms of Carpal Tunnel Syndrome

I will attempt to concentrate on the aspects of this painful ailment as it relates to guitarists in the remainder of this article.

The guitarist uses very fine and complex muscles, tendons and ligaments when plying their gift. We tend to be overly sensitive to our every ache and pain. We tend to gravitate towards the worst case scenario when we think about the long term results from something like this. Most of us respond with inaction while dealing with symptoms of CTS. So let’s give our heads a good shake and let’s DO SOMETHING ABOUT IT!

Here are a couple of exercises that you can do to help manage this affliction.

  • (1) Massage your playing hand with your opposite hand by “kneading”the meaty part of your palm and working “outward”.
  • (2) Play as much AIR GUITAR as possible. this loosens up your fingers and gets the blood going. Be sure to let your wrist move with the motion of your fingers, this will prevent your hand from cramping up.
  • (3) If your hands feel tight or feel as if they are asleep, use a heating pad for about 20 minutes prior to playing. if this is not practical, run your hands under warm/hot water for about 5 minutes, rolling your fingers while the water is on. If you can’t do this,and you’re doing a gig at a restaurant, order a baked potato and hold it in your hand for a good 5 minutes or so, repeat for 15 times.
  • (4) Grasp you hands together in front of you. Apply light isometric pressure and lift you arms up over your head. Bring your clasped hands down behind your head. Return them to a position in front of your torso. Stretch out to the left, then the right keeping those hands pressed gently but firmly together.

So hopefully this will help some of you who are afflicted with this horrible disease.

Keep on Jammin'(after you warmed up with some of these exercises!)


Filed Under: Guitar Maintenance, Guitars, Health Tagged With: Carpal_Tunnel_Syndrome, CTS, exercises, guitar, hand_exercises, hand_issues, Health, limitations, painful, playing_styles, Symptoms

Anyone see my pick for this thing

April 15, 2008 by Chris

Good God, I thought that my RD Artist was heavy!

bigelectricguitar3.jpg

Keep on Jammin’

BTW don’t forget to check out my newish Guitar blog Guitar Licks and Tips. I’ve got some great posts over there for guitar and music enthusiasts to go through.

Filed Under: Entertainment, Guitar Maintenance, Guitars, Humor Tagged With: Artist, big elctric guitar, blog, BTW, custom guitars, funny guitar pics, God, guitar, guitar licks, guitar music, guitar tips, hand made guitar, heavy, jammin, Licks, Music, music enthusiasts, over sized guitar, pick, posts, RD Artist, Tips

Guitar side ports

September 28, 2007 by Chris

guitarsideport1.jpg 
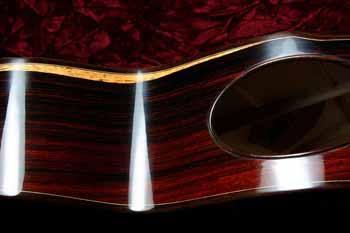
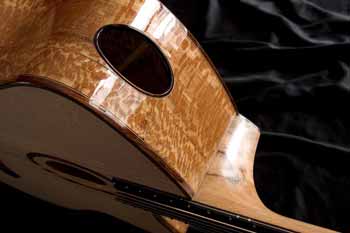
The one thing that I see in the evolution of the acoustic guitar today is its link with the past from Canada’s own, Glenn Gould.

He used a unique approach while playing in his later years, around 1983, when he took away part of the piano body to let the sound come out of the instrument in a unorthodox way.

First of all, the guy was way ahead of his time. What he did was to remove the wooden cover section that is used to cover the piano keys. He removed this part entirely. He would also close the piano lid on his concert piano, allowing the sound to be sent through the missing cover section of the piano.

This allowed him to hear the subtle tones while playing his music.

This was best shown in his 1980’s work of the gloomy nature of life. The slowness of some of his canon’s reflect the need for this type of sound exposure that the musician needs to fully understand what the audience hears, but as a very unique approach.

Second of all, the guy went to places that no one probably ever thought of venturing. I wonder if the person who thought of the guitar side ports ever watched Glenn Gould Hereafter? If he did, I bet this is where he may have got the idea, but then again I could be dead wrong.

darksideport.jpg

I have been toying around with the idea of putting in a new state of the art pick up system in my Larrivee. The system is called the LR Baggs iMIX. It captures a lot of the character in my guitar with an active response to it. That means that the pickups pick up the aggressive or passive playing of the strings on the guitar.

Now in order to place it in there, I must have it installed inside the body above the sound hole, closest to my face. That’s fine with me. The next question is what in the world do I do with the hole that the factory installed system sat in? It would look mighty funny just viewing a rectangular opening right there in my face. Do I just leave it there or what should I do with it? Here is my best option, I think.

I have always wanted both of my acoustic guitars to have pick ups so I can have a back-up on stage. So why not put my old pick up from the Larrivee into my old Aspen acoustic guitar. Perfect, I think? Unfortunately if I do this I will have this opening on the side of the body near my chest where the old system was. It would look so odd and out of place that I would be reluctant to let anyone look at my guitar. So while talking about my problem with the guitar tech at the 12th fret, he gave me this fabulous idea of the side port!

lightsideport.jpg

They could change the look of the old hole and create a fancy looking design in it’s place!

This will allow a small portion of the sound to come up directly to me acting like another sound hole or a monitor if you will. This will not effect the tonal qualities of my baby I have been told. The tech had one in this part of the workshop that he made and let me try it out. Not only did it look very cool and original, but it was nice to have some sound coming from a part of the guitar that I have never heard it coming from in the past.

Now all I have to do is convince my wife about this one, wish me and my Larrivee luck will you all?

Keep on Jammin’

Filed Under: Glenn Gould, Guitar Equipment, Guitar Maintenance, Guitars, History, Musicians, My Equipment Tagged With: 12th Fret, Acoustic, acoustic guitar, Canada, concert, fret, Glenn Gould, guitars, hole in guitar, instrument, Larrivee, LR Baggs IMIX, Music, musician, pick ups, play, playing, remove pickups, side ports, sound, strings

Time to overhaul my Gibson RD – Artist?

August 10, 2007 by Chris

This guitar is my baby! I have been through thick and thin with this thing. I now feel and fear that this perfect instrument has to be improved in one area and one area only.

I love the “character marks” on it, that means “wear and tear” for the uninitiated. The oxidization or colour change in the Ivory throughout the guitar, makes it look beautiful and vintage. The neck is perfect. The tuning pegs are still working quite well, stays in tune for ages. The active electronics need some work and I want to have that looked at. Now the only biggest drawback to it is the weight. If you ever had to play this thing for 2 hours while your playing live, you will know what I mean.

This is the only big obstacle that I have to deal with. The way to resolve this will tax my nerves to the limit.

By reading a great site in blog land, I’ve found that I have a little voice in my head pushing me more and more towards confronting this issue. The site is called Building the Ergonomic Guitar.

He says that the way to get the best results are to change to an ergonomic strap called “The Dare Strap“. This idea is the least invasive out there that he’s heard.

So I was just wondering if I should just router some areas on the back of the guitar to lighten up my load. I realize this sounds like some “Hillbilly that just fell off the turnip truck” idea but it may work? I am just asking for ideas here people. I don’t even own a router.

There is this guitar player in Brantford in the early 70 -90’s called Scott Merrit. The man was a god on guitar. He played in the open tuning style that I had only heard of at the time, but have never done anything quite like. I must admit that when he went into the local guitar shop called “Music and Sound”, I would just put down my guitar and pretend that I didn’t play. I know it was a fantastic missed opportunity by a little kid, but could you blame me I was in grade 8.

He was awarded a Juno for the best upcoming artist and vocalist in Canada in the mid 80’s. Scott had the same 1959 Fender Duo-Sonic that I have. The big difference between both of ours was that he had cut a handle hole in the upper right portion of the guitar where you might rest your right forearm on, while I left mine complete. It was the neatest thing to look at. While I was over at his place in high school, he showed it to me.

I guess if Jimmy Page can use this guitar at all of their Knebworth shows for Misty Mountain Hop throughout the 70’s, then it’s good enough for me!

If someone has ever done this type of work on their guitar or is very talented with a router, can you give me some advice on the pro’s and con’s or even alternatives to this procedure?

Keep on Jammin’

Filed Under: Guitar Equipment, Guitar Maintenance, Guitars, Musicians, My Equipment Tagged With: 1959 Fender Duo Sonic, Brantford, Canada, cut handle hole, cut out, dare strap, ergonomic guitar, fender, forearm rest, guitar, guitar player, heavy, instrument, invasive, Jimmy Page, Juno, lighten guitar, Music, open tuning, playing, router, Scott Merrit, sound, techniques, too heavy, tuning pegs

Tremolo Bars

August 2, 2007 by Chris

Has anyone ever wondered what the tremolo setup in their guitars look like, but was too afraid to take it apart. I’ve never had a guitar with a tremolo bar but my buddy did and one day he decided to show me.

My buddy in Brantford was a collector of guitars. He was rather talented, but was more into collecting them, then playing them. Nice hobby if you can afford it. I was very fortunate one evening to see a “59 Fender Strat” that he had picked up for his collection.

One night I was invited to bring my HiWatt and Gibson RD to his house with a couple of buddies to jam. I had come in, set up my amp and he gave me a beer. The boys always looked forward to jammin’ with me because I was one of the few guitar players who liked to challenge myself with different playing techniques. Most of the time they just watched and asked questions. That always drives me crazy! Then my buddy went over and brought out a guitar case and placed it in front of me.

When he opened the case, I felt my body shaking inside. It felt like someone had just opened up the “Ark of the Covenant” and was looking at the “10 Commandments” written by God and given to Moses on the mountain, inside!

I had never seen this legendary 59 Strat let alone had the ability to play it.

I just looked at it for a while and then he said “why don’t you plug it in?” I then picked it up and studied it intensely. After 10 minutes of viewing every angle and part of this mythical beast, I plugged it in and played for around 2 hours straight.

After I stopped playing I asked him “What does the Whammy (Tremolo) Bar system look like?”. He drew a quick picture on a pack of smokes and then asked me if I wanted to see this one’s? The guy who he had bought it from then took it from me and started to take off the back to expose the inner workings of it. It looked something like this:

fender-trem-as.jpg

Now to give you a better understanding how it works, I have a video for you.

So if you have one of these on your axe, you now have a better idea of how it works and how to roughly adjust it. I strongly recommend that you take the back cover off it and just take a look around just for an educational experience.

Remember by taking the cover off the back of your guitar to take a look, you won’t blow it up! This will make you more aware of your overall guitar and make you feel more comfortable with it. Knowledge is power and besides, it makes you look like you know what your talking about.

Take pictures and save them. Later on this may become a life saver if you do start adjusting it. This will allow you to see what it looked like before you started. Actually, take pictures of every stage of it. There is nothing worse then having a couple of screws left over when you think your done! It happens to the best of us!

Keep on Jammin’

Filed Under: Electronics, Guitar Equipment, Guitar Maintenance, Guitars, My experiences, Technology, Video Tagged With: 59 Fender Strat, adjust, amp, Brantford, diagram, fender, fender whammy bars, guitar, Guitar Maintenance, guitar player, guitar whammy bars, guitars, Hiwatt, how to, maintenance, picture, play, playing, tremolo, tremolo bars, tremolo setup, Video, whammy, Whammy bars

I’m not violent but shouldn’t someone get these idiots

April 9, 2007 by Chris

I am forever asking certain guitar players “why don’t you wind up the excess string on the end of your guitar head? Someone is going to lose an eye!” This style of finishing is like a cowboy lasso. I always ask them if they have ever had the end of their string go into their finger or hand when restringing? Can you imagine what would happen if that nice little lasso thing ever untangled and hit someones eye? Well if that ever happened, you better get a lawyer, and fast!

When I was in high school, I had the honour of being in a band with the best theoretical guitar player/teacher I have ever known. These accomplished musicians, like most I played with in my early years, were much, much older then I was. We were in this band that played Beatles tunes and the like, only to make money and not a career of it. I was the only student that Chris P ever played in a band with to my knowledge. I recall with crystal clarity the day I learned this lesson about the excess string thing.

The bass player in the band was the best in our area. He was a big body builder as well. He was more like a fridge with legs, in all honestly. I was one of those idiots in my early years, who thought it was cool to have my strings tied up at the end of the guitar that looked like a lasso looking thing. The first practice we had, he stood up beside me and looked me in the eye, having to bend down really low to do so and said “I had a string like that almost pick my eye out by a guitar player once”. After having let the water that poured down my leg dry, I ran to find some pliers to cut off the excess. He was really a nice guy but …

Unless your perfect, and we all know someone like this, getting the end of a string in the finger is such a painful experience. I have had this experience a couple of times and believe me, you will pay much more attention when you restring your guitar in the future, if this ever happens to you. I actually nicked or pierced my finger while cleaning the head of my guitar once as well. There you go kids, cleaning is bad for your health, you heard it here first!

Always practice safe guitar maintenance.

Keep on Jammin’

Filed Under: Guitar Equipment, Guitar Maintenance Tagged With: guitar, Guitar Maintenance, guitar player, Guitar safety, Guitar upkeep, learn, musician, pain, restring your guitar, strings

How to restring your guitar

April 6, 2007 by Chris

NOTE: This is for beginners -as in people wanting to learn more about restringing techniques.

You know, this is my favorite but most dangerous part of guitar maintenance that I or you will ever do. Watch you fingers when working with the strings at the head of the the guitar. Look at some previous posts for medical advise.

(1) Take the strings out of the package. You either have strings that are colour coated, with a chart on the box or you can figure them out by looking closely at them. The thickest string is at the top and the thinest at the bottom.

(2) Put the string through the tail piece (on the body of the guitar).

(3) Place the body of the guitar on a table, with blanket on it so you don’t scratch the bottom of guitar. It also helps you move the guitar fast and smoothly when working. Make sure that you can have access to a chair so you can work at a good eye level to watch closely at what your doing.

Part (4) is background info that you need to understand before proceeding to part (5) & (6)

(4) Follow these visual steps. The last picture shows a little gap from where the bottom of the string is to the remaining part of the shaft of the tuning peg. I leave enough string or slack allows me to keep turning the tuning knob until the bottom of the string completely fills that space. I do not like to see any part of that shaft exposed. The more string that is attached means, a tighter wind and less room for the string to stretch. A change in the tension of the string = a change in tuning.

NOTE: This is the tricky part that you will have to determine by yourself because every guitar dimensions are different. After doing a couple of strings, you will get the hang of it. IF YOU DO THIS WRONG, YOUR GUITAR WILL NOT BLOW UP, ok? Just relax. Do not attempt while intoxicated.

(5) Move the guitar on the table so you can sit in a position that will allow you have the guitar head over and away from the table to let you start winding the strings.

(6) At this point we actually can start the winding process. Now with your right hand, grab the string that your working on by having fingers (index to pinkie), pulling up on the string while using your thumb pushing down on the string.

NOTE: Have your thumb push the string down on the fret board, right near the nut, where the string is suppose to be on the neck of the guitar. This will provide a small amount of the tension you will need to start winding the tuning peg.

(7) SLOWLY turn the tuning peg in the direction that you want. For guitars with 3 strings on each side of the head of the guitar, turn the head counter clock wise; for all others go clock wise. Pay close attention to the string that it follows going down the tuning head that will cover the gap that I talked about in part (4). The more you reach the bottom of this tuning peg, let the tension that you thumb is exerting on the string off little by little until you have covered that area of the shaft of the tuning peg.

(8) Place any finger you want to use (I use my index) directly on the nut (the white piece between the top of the neck and head of the guitar) of the guitar that corresponds to which string you are replacing. I want you to put pressure on that direct spot that holds your new string in place. This will stop the string from moving anywhere while you are doing the next part.

(9) With your right hand, grab the string that you are working on and pull the string in a upward and downward direction. Remember to keep your finger down tightly on the nut. What this is doing is, by pulling upwards and downwards on the strings, it tightens or pulls the strings coils on the tuning head closer thus making them less likely to move or slip.

Note: A change in tension = a change in the note or key of the string. When they slip or loosen up, the guitar string goes out of tune. The exact tension of the strings determines how they vibrate. The vibration is the note you want. Think about how a sign wave works, if your not sure or want to know more look up the details. Remember, knowledge is power.

Keep on Jammin’

Filed Under: Guitar Equipment, Guitar Maintenance Tagged With: acoustic guitar, electric guitar, guitar, Guitar Maintenance, how to, How to re string your guitar, restringing your guitar, string tension, tightening strings, vibration

Breaking in new guitar strings

April 3, 2007 by Chris

After putting new strings on your guitar, do you ever notice that they go out of tune easily for a while after? You’d think that after all of your careful preparation and time that you put into it, that you shouldn’t have to worry about tuning it for a long time to come? WRONG! You have to break them in.

What I do religiously after putting strings on is this.

(1) Put the guitar on your lap.

(2) Place any finger you want to use on your left hand, (I use my index) directly on the nut (the white piece between the top of the neck and head of the guitar) of the guitar that corresponds to which string you are replacing. I want you to put pressure on that direct spot. This will stop the string from moving anywhere while you are doing the next part.

(3) With your right hand, grab the string that you are working on and pull the string up and down. Remember to keep your finger down tightly on the nut. What this is doing is, by pulling upwards and downwards on the strings, it tightens or pulls the strings on the tuning head closer together thus making them less likely to move or slip in the future.

Note: When strings slip or loosen up the guitar goes out of tune. The exact tension of the strings determines how they vibrate and at what frequency. The vibration is the note you want. Think about how a sign way works, if your not sure or want to know more look up more details.

This is important when re-stringing while playing live because without doing this before you start playing again, the string will become more and more out of tune every time you hit or bend the string, thus making you sound like a fool. You don’t want that do you?

Keep on Jammin’

Filed Under: Guitar Equipment, Guitar Maintenance Tagged With: break in guitar string, Guitar Maintenance, guitar tuning, How to keep your guitar strings in tune, tighten guitar string, vibration

How to figure out what strings you really need

March 29, 2007 by Chris

If you want your guitar to sound it’s best when you play it, you have to determine what type of strings you need to compliment your style of playing. Take your guitar in to have the intonation on your axe set by the best guitar technician possible in your area.

Intonation on a guitar is what we call the action on your guitar. This allows you to play/hit your strings effortlessly. Trust me, it’s worth the extra few bucks and time to get this done correctly. The better the intonation, the better the chance of your strings staying in tune longer. The less you have to bend the string, the less they lose their tension. That should speak volumes in itself.

I am forever fine tuning my guitars. People tell me that I make it look like an art form – or maybe they mean I’m being anal retentive!

When you go into a music store tell them what style of music you are playing, and how you want the guitar to react. I recommend kissing this person’s butt by going to see them on a Tuesday in the A.M. if possible.

Going there on weekends is like going to the lions den. There are always way too many kids and rookies in the store to drive them crazy. Monday is the day they try to remember what they were told to do and start off where they last ended. It can be the craziest part of their work week. Besides, who really does their best work on a Monday? Makes sense, huh?

Bringing a coffee can go a long way. Yes, I’m a kiss up artist too.

After you’re done kissing up, ask the techie what type of set-up they are putting on your guitar. This will help you in determining or narrowing down what type of string you should use. You can even ask him or her what type of strings they would recommend for your guitar and playing style.

Remember, a techie is the person who works on guitars. They are players themselves in their own right, but having said that, they also might not the ones to help make your final decision about your strings. NO disrespect intended to all you masters of guitar maintenance! The techie helping you might be biased towards certain types of equipment and or a certain type of sound. The more opinions the better, so ask around for further input. Remember, knowledge is power.

Keep on Jammin’

Filed Under: Guitar Equipment, Guitar Maintenance, Shopping, Technology Tagged With: acoustic guitar strings, electric guitar strings, guitar intonation, How to pick which guitar strings to use

Humidity issues

January 14, 2007 by Chris

This is the most important part of guitar maintenance that you always forget. I know that this is a problem that I have from time to time.

I just can’t resist the look of my Larrivee in the morning when I wake up and walk on down the stairs! When the sun bounces off it’s beautiful finish and refracts the light into our living room. We do use a cold mist humidifier and have the furnace humidifier around 35%. I also use a “Damp it, Super” with my guitars as well.

The Humidity Levels on acoustic guitars should monitored more closely now that you are aware of it, there are NO EXCUSES! I wish that I payed attention to this when I first got my Sitar. Now, the damage to this fragile instrument is irreversible. Don’t let this happen to you!

Filed Under: Guitar Maintenance Tagged With: fixing guitar intonation, guitar action, guitar bridge, guitar damp it super, Guitar Maintenance, guitar sound board, warping guitar body

  • 1
  • 2
  • Next Page »

Connect with Us

  • RSS

Suggested Sites


Eavestrough Cleaning Toronto

Categories

Recent Posts

  • 5 Amazing Alternative Rock Albums Of The 90s
  • Want To Learn To Be A Musician?
  • How Can Ambitious Musicians Find Great Advice From Professionals?
  • Which Musical Instruments Are Hardest To Learn?
  • Things To Know When Beginning A Career In Music
  • Suicidal Tendencies Still Rocking After All These Years
  • Learning Guitar Basics Online

Recent Comments

  • Judy Green on The Old Gasworks was a Toronto institution for music lovers and bands
  • Frank Bolduc on The Old Gasworks was a Toronto institution for music lovers and bands
  • Tom Farr on 5 Amazing Alternative Rock Albums Of The 90s
  • DW on 5 Amazing Alternative Rock Albums Of The 90s
  • Nick Othen on 5 Famous People And Their Guitars

Subscribe

Never miss a post
FREE - Subscribe NOW!
Read our posts in your favorite RSS reader.
rss feed

OR

Subscribe to Guitar Licks by FREE Email Newsletter


Follow us on TWITTER!

Alltop, confirmation that I kick ass
Alltop Guitar news

Shopping

Gifts, Gadgets,
Books and More!

Site Ratings

Visitors


Meta

  • Log in
  • Entries feed
  • Comments feed
  • WordPress.org

Archives

Search

Pages

  • About
  • Archives
  • Become a Guest Blogger for Guest Licks
  • Blog
  • Canadian Bloggers
  • Contact
  • Disclosure
  • Do Follow Bloggers
  • Links
  • Privacy Policy
  • Toronto Bloggers

Blogroll

  • Guitar-Werks
  • Eavestrough Cleaning Toronto
  • Guitar Boomer

My Store

  • My Store

Other Sites

  • Breath of Life Photography
  • The Web Files
  • You are in my world now
  • Celebrity Scoop
  • Celebrity Scoop 2

Tags

Acoustic amp band bands Brantford Bruce Cockburn Canada Canadian concert Entertainment fender funny General guitar Guitar Equipment guitarist guitar player guitars Home house Humor humour instrument jammin jazz John Mayer keyboard Live Music musician Musicians play playing Progressive Rock Pylis rock RUSH Songs to play sound strings Technology Toronto tour Video YES

Copyright © 2026 · News Pro Theme on Genesis Framework · WordPress · Log in